Category Archives: Exposure

NIKON INTERVAL TIMER

Even use the interval timer feature on your Nikon?  Easy to set with normal shutter speeds, but at speeds between 15 and 30 seconds things don’t work as expected.  Part of the problem lies in Nikon’s definition of the “interval” between shots.  One might expect this to be the time between one frame and the next, the shortest option being one second.  If you wanted to shoot several 30 second frames, at one second apart, the most logical sequence would be 30 seconds exposure, one second interval, 30 seconds exposure, one second interval, etc.  Nope, it doesn’t work that way.  In Nikon-speak the “interval” is the time from the start of one frame until the start of the next, so you need to add that one second to the sequence.  30 seconds exposure, 31 seconds interval, 30 seconds exposure, 31 seconds interval, etc.  Try this, and to your surprise this timer thing still won’t work right.

The problem here is that while the marked shutter speed might say 30 seconds, it’s really slightly longer at 32 seconds.  How come?  Well, shutter speeds on a camera are in stop increments, doubles and halves (the definition of a full “stop,” twice as much or half as much).  But ever notice that the numbers don’t work out that way?  1 second, ½ second, ¼ second, 1/8, 1/15, 1/30…hey, that really should be 1/16 sec., 1/32 sec., 1/64 second, etc.  OK, no big deal going that direction.  But go the other way and count off seconds.  1 sec, 2, 4, 8, 16, 32…even though the camera says 15 and 30.  Set your camera at 15 seconds, and the minimum “interval” is 17 seconds (16 + 1).  At 30 seconds the minimum “interval” is 33 seconds (32 + 1).

To be honest I rarely use the interval timer.  When I want a sequence of long exposures I normally use a Nikon MC-36, a timer cable release, which allows me to set shutter speeds over 30 seconds along with the number of frames to be taken, with the camera on “bulb.”  Just remember that the needed “interval” is in Nikon-speak.

AUTO ISO IN MANUAL

Many current cameras have a “hidden” autoexposure feature, an option I use quite often when working wildlife.  If your camera has “auto ISO” buried someplace in the menus, you probable can use this feature.

Three choices control exposure:  shutter speed, aperture, and ISO.  We generally lock in two of these, and vary the third.  In aperture priority you select the f/stop and ISO, and the camera sets the shutter speed.  In shutter priority you select the shutter speed and ISO, and the camera sets the f/stop.

With most cameras it’s far easier to change shutter speed and/or aperture than it is to change ISO.  After all, with both Nikon and Canon that’s what the command dials by themselves do as default behavior.

Look in your camera’s menus to see if you have “auto ISO.”  If so, turn it on for this test.  The way auto ISO normally works is that you set a minimum shutter speed and a maximum ISO value.  So long as you’re shooting at that shutter speed or higher, the camera will vary the ISO needed for the situation.  If the light level drops below this range one of two things happens: (a) in aperture priority the shutter speed continues to slow below your preferred minimum, while the highest ISO value is maintained, or (b) in shutter priority, once the aperture is wide open the camera underexposes, usually with some sort of viewfinder warning indicator, but still using the highest ISO.

But here’s the catch for bird and mammal work: setting a minimum shutter speed for wildlife means you’re probably going to choose a fast speed in order to stop any possible action.  What if you intentionally want a slower speed?  At the same time, at any given light level you don’t want to work at any higher ISO than necessary; you always want to use the lowest ISO you can get away with, given the situation.  That fast minimum shutter speed you selected may force you to shoot at a high ISO even in good light.

OK, back to those three variables that control exposure.  Reread that paragraph up above, and you’ll notice that I did not mention the manual exposure mode in which what you set is what you get.  In this exposure mode you have to manually set both the shutter speed and the f/stop.  Now here’s the kicker: if your camera has auto ISO, most likely you can use auto ISO while the camera is in manual mode, and let the camera vary the ISO needed for whatever shutter speed/aperture combination you select.

However — and this is a major “however” — you must know how to work in the manual mode.  I’m always amazed at how many photographers today do not know how to do so.  If you’re not sure, read my June 2015 blog post, and your camera’s manual, and practice.

So, switch to manual exposure mode, and turn on auto ISO.  Set the highest ISO value to whatever maximum ISO you’re comfortable using with that camera.  Set the camera itself to its lowest native ISO.  For Nikon cameras, the “minimum shutter speed” choice in auto ISO does not apply when the camera is in manual mode (and I’m pretty sure this is also true for Canons, but not being a Canon user myself…).

What you have basically done is turn the manual exposure more into an autoexposure one.  You select the f/stop and shutter speed you want, the camera sets the necessary ISO.

But how can you add or subtract the amount of light (for example, in order to reposition the histogram when shooting RAW) if the camera adjusts the ISO for any given shutter speed/aperture combination?  Just as in any autoexposure mode, you use the camera’s autoexposure compensation.  This does not affect the shutter speed or aperture you’ve set; after all, in manual mode what you set is what you get.  Instead, it changes the ISO the camera selects.  Dial in a +1 autoexposure compensation, and the camera raises the ISO by one stop; dial in a -1 compensation, and it drops the ISO by one stop.  Since the camera is in manual mode, the shutter speed and aperture displayed in the viewfinder will not change, but there will be some sort of indicator that exposure compensation is in effect.  You’ll have to pay attention to what you’re doing, and remember to return the compensation back to “zero” when no compensation is needed.  If the light level drops so low that the camera maxes out ISO, your set exposure values will be too low.  Just watch the meter display, which in this case will show underexposure.

Should you use this “auto ISO with manual” mode all the time?  Heavens, no.  As with all modes on your camera, you use what is appropriate to the situation.  I personally find auto ISO in the manual mode extremely useful when I’m working wildlife.

USING MANUAL EXPOSURE

In my photography I use Aperture Priority metering most of the time.  I take a shot, look at the histogram, and use Exposure Compensation (EC) to add or subtract light as needed.  Yes, this works great most of the time…but most of the time does not mean all of the time.  There are shooting situations where it is best to not use an autoexposure mode (aperture priority mode, shutter priority mode, or program mode).  This means selecting both the shutter speed and the lens aperture; that is, using manual exposure mode.  In this mode, you have to physically set both the shutter speed and the aperture, and the camera remains at those settings — and exposes at those settings — no matter where you aim the camera.  What you set is what you get, period.  EC does nothing to change the camera’s settings.  It affects the meter readout, but it does not in any way change the shutter speed or aperture on the camera, so turn EC to zero.  In manual exposure mode, what you set is what you get.  If you want to lighten or darken the image, you have to physically change the shutter speed or the aperture or the ISO.  The camera itself does not change anything.  What you set is what you get.

This blog post comes about because of a Joseph Van Os Photo Safari I recently led.  We were standing on the top of a cliff overlooking the ocean, preparing to photograph birds flying past.  If they birds were above us, the background was a pale milky blue sky.  If below us, the background was a dark navy blue ocean.  So what’s the right exposure?  Any autoexposure mode would be biased by which background was in the frame.  One solution would have been to work only those birds against the pale sky, or only those against the dark ocean.  But the birds were not cooperating in that manner.  They would swoop around, at one moment be above us and the next moment be below us.  When I mentioned that this situation called for a manually set exposure, to compensate for the different background tonalities, the response I got reminded me once again how many photographers have never used a camera in the manual exposure mode.

If the light remains the same, once you correctly set a manual exposure, it is correct for all subjects in that light regardless of their tonality.  OK, but how to set that exposure?  Pick something, it doesn’t matter what, in that constant light, and adjust for it’s tonality.  When you set the camera to manual exposure, an analog display will appear in the viewfinder with a “zero” point in the middle of a “plus” and “minus” line.  “Zero” is the starting point.  Change the shutter speed and/or aperture until this mark in highlighted, and you have set the camera to render whatever you aimed it at to be rendered as a medium tone.   Go to a “plus” mark, and you have added light.  Go to a “minus” mark and you have taken away light.   So, aim the camera at a single tone, and meter it and only it.  Physically change the shutter speed and/or aperture to render that area at whatever tone you want it to appear.  Here’s a quick and dirty way to think about this.  At the “zero” mark the camera will render that subject you metered as a medium tone.  At the “plus one” mark, one stop open, the metered subject will be rendered as a “light” tonality.  At the “plus two” mark, two stops open, it will be rendered as a “very light” tonality.   At the “minus one” mark, one stop down, it would be “dark” subject; at “minus two” it would be an “very dark” subject.

Suppose you meter a blue area.  Here’s what would happen as you change the shutter speed/aperture combination:

+3, whitish blue
+2, very light blue
+1, light blue
0, medium blue
-1, dark blue
-2, very dark blue
-3, blackish blue

Back to those birds….  The solution would be to pick an easy area to meter:  either the pale sky, or the dark ocean water.  Let’s use the pale sky; it was roughly “very light blue.”   Set the camera to manual exposure mode, aim it at the area of sky where the birds would be, and adjust shutter speed/aperture until the “plus two” mark was highlighted.   It doesn’t matter what combination shutter speed/aperture you use to get started.  Pick the equivalent combination that gives the shutter speed needed or the aperture needed.  Suppose you aimed your camera at that sky and the exposure combination that yielded “plus two” was 1/125 sec. at f/11.  Well, you know that 1/125 sec. is way to slow a shutter speed to freeze a bird in flight.  1/125 sec. at f/11 is exactly the same as 1/250 sec. f/8, or 1/500 sec. at f/5.6, or 1/1000 sec. at f/4, etc.  Need a faster shutter speed?  Raise the ISO one stop, and you could shoot at 1/2000 sec. at f/4 (or any equivalent combination).  Set the shutter speed/aperture combination you want to use, and fire away.  So long as those birds remain in the same light, and the light itself does not change, the exposure will be correct no matter the background.

I can think of a number of situations where using manual exposure would be best.  Consider working a black sand beach, with waves breaking white over it.  The camera meter would read a black subject at one moment, a white subject at another.  Or imagine you’re using a zoom lens to photograph a dark buffalo standing in the snow in Yellowstone.   As you zoom the lens, the image changes from primarily snow to primarily buffalo.  Or a situation I faced back in February while photographing red-crowned cranes.  The white cranes were standing in a snow-covered field, but as they took flight the background became leafless winter trees, a dark toned area, and then to medium blue sky as the birds rose higher.  In all three situations, so long as the light remained unchanging, the solution was to meter one area, set the exposure using manual mode, and shoot away.

If you’re not familiar with the manual exposure mode, I would strongly suggest some practice.  But let me add one final statement:  with all digital cameras, you cannot evaluate exposure or color via the LCD on the back of the camera.  The histogram is your friend, whether shooting manual mode or one of the autoexposure modes.  Learn how to use manual exposure mode, and learn how to read the histograms.

Hummers

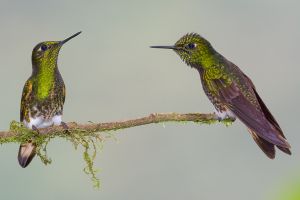
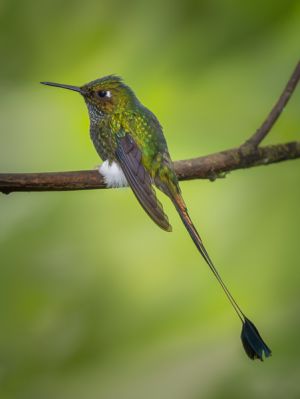
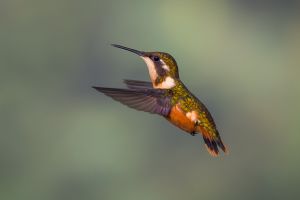
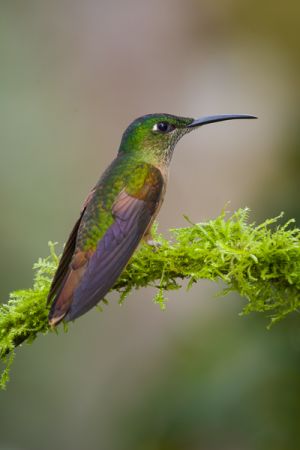
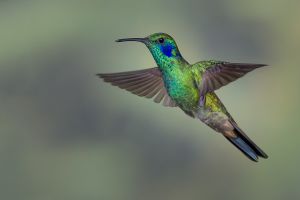
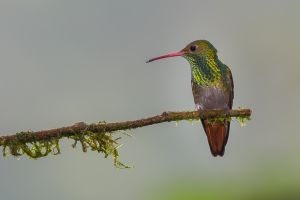
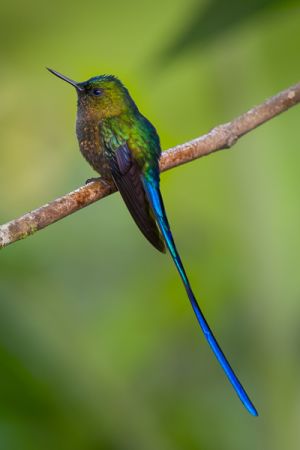
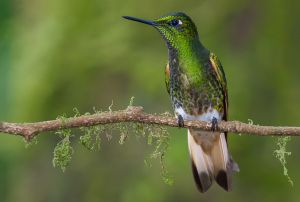
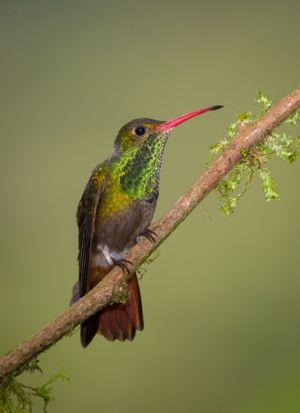
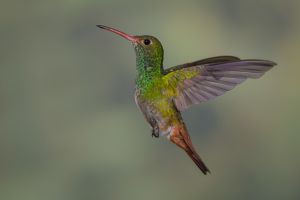
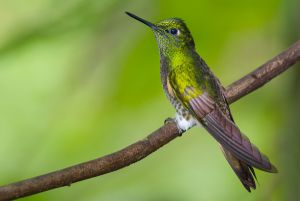
I couldn’t resist.  Earlier this year, while on my way to the Galapagos, I stayed over in mainland Ecuador for a few days to photograph hummingbirds.  Hummers have been worked a lot, but they are magnificent little birds, and, since I was in a location with many species, why not spend a few days photographing?  As I said, I couldn’t resist.  Here’s a short slideshow.

Buff-tailed coronet hummingbirds.Booted racket-tail hummingbirdPurple-throated woodstar hummingbird.Fawn-breasted brilliant hummingbird.Green violetear hummingbird.Rufous-tailed hummingbird.Violet-tailed sylph hummingbird.Buff-tailed coronet hummingbird.Rufous-tailed hummingbird.Rufous-tailed hummingbird.Buff-tailed coronet hummingbird.

For hummingbirds on perches:  Nikon D800E in 1.2 crop mode, 500mm lens with an extension tube (for closer minimum focus), plus a bracket-mounted flash with Better Beamer flash extender attached, flash output between -1 and -2 fill.  Matrix metering, aperture priority (so shutter speeds were between 1/60 and 1/250 sec.), ISO 1000 (low light where I was photographing), f/11.

For hummingbirds in flight:  Nikon D4 with 80-400mm lens, manual exposure, ISO 400, 1/250 sec. at f/11.  In order to freeze the wing movement, I needed to light the entire scene (no fill flash here) using very short flash durations.  This is actually easy to get: set a regular flash on manual output at about 1/16 power and position the flash relatively close to the subject.  I used four flashes: one on-camera (set at an even lower power output), two on light stands aimed from either side toward where the birds would fly into a feeder, and one on another light stand and aimed at an artificial background (a print of out-of-focus vegetation).  To determine flash position, and consequently the f/stop to use, take a shot and take a look at the camera’s LCD.  The on-camera flash triggered all the other flash units; in other words, the flashes were simple slave units.  Since I was the only person working the area my flashes did not interfere with any other setup, otherwise I might have needed radio flash triggers which I don’t own.

I might note that most Nikon flashes can be set in an SU-4 mode, which allows them to act as basic optical slaves with any brand of camera.  Slave flashes certainly don’t need to be current models.  I have a Nikon SB-80DX (discontinued 10 years ago) which I picked up brand new in the box about a year ago for $25.

ETTR TO THE FAR RIGHT

If you’re a RAW shooter you should already know about ETTR, Expose to the Right.  The theory behind ETTR is that the best image capture for the most possible information is when the histogram is pushed to the right, to the “bright” side.  Just keep adding exposure until that histogram is over to the right side of the graph.

OK, but how far to the right?  You definitely don’t want to clip the highlights.  DSLR cameras have a clipping warning display, the “blinking highlights,” or “blinkies” as they are commonly called, which shows up on the camera’s LCD.  Many cameras will even display the blinkies for each individual color channel, besides the composite luminosity.  But remember that the image displayed on the LCD is not the actual RAW file; it’s a jpeg thumbnail created on the fly by the camera.  Camera manufacturers have coded in some headroom with the blinkies, as they don’t want customers to be angered at blown out highlights.

Fine.  But I would suggest running a test to determine exactly what the correlation is between when the blinkies start, and the actual clipped highlights in the RAW file.  You can easily run a test to determine this.  Set your camera to Aperture Priority, lock it firmly on a tripod, and aim at any scene.  Increase exposure until the first blinkies appear.  Note this frame (probably the easiest solution would be to delete any previous frame you shot to get to this point).  Now shoot several more frames, using  Auto Compensation to add 1/3 stop to each successive frame.  Open this series in your RAW file software, such as Lightroom or Adobe Camera Raw, turn on the clipping warning in the software, and check each frame.  I’ll bet that the starting frame, the one the camera blinkies said was clipped, is actually not clipped at all.  In fact, you might be surprised at just how much headroom you have.  With my particular Nikon D800E and a medium toned test subject, I have to add 1.3 stops beyond the blinkies before the RAW file has clipped highlights.

So what’s the point of doing this?  Why worry?  Well, with digital capture, noise lives in the dark exposures.  If you want the best possible data, start with the best possible exposure.  With my particular camera I’ll add some extra exposure whenever the subject is such that I can, especially when working at higher ISO values where noice is always a problem.  Recently I shot a landscape at ISO 1600.  I shot at both the metered ETTR exposure, and at my “extra 1.3 stop” ETTR settings.  The difference was remarkable.  The first image needed noise reduction.  When I looked at the second shot, the one when I had added 1.3 stops, the image on the LCD appeared almost washed out.  But when I reduced the exposure in Lightroom (my standard RAW file software), all the noise was gone.  In fact, my tests suggest there is even a slight difference when the camera is set at base ISO 100, where I use the camera the most.

Does this really matter?  The answer depends on how compulsive you are about quality, the realities faced in the field, and on how the photograph is to be used.  Just remember, ETTR is for RAW capture only.  And  you don’t want to lose an image by blowing out the highlights.  There are indeed some scenes with the highlights already maxed out.

Once you know how the blinkies in your camera correlate to the actual RAW histogram, a simple and safe solution — particularly for static subjects such as landscapes — is to set your camera to bracket another  frame that is 2/3 stop more exposure than the ETTR histogram on the LCD.  When I shoot with my D800E, I know that I’ll be adding that extra bit of light whenever I can.