Category Archives: Hardware

D800 + ND = Magenta cast

Images taken with heavy ND filters will occasionally show a strong magenta cast.  Almost all ND filters transmit some infrared wavelengths, and this IR light is one of the primary causes of the magenta cast.  At the same time, some digital camera sensors are more sensitive to IR than others, and in my experience the Nikon D800/D800E twins fall into this group.  However, for most situations there is a simple solution.

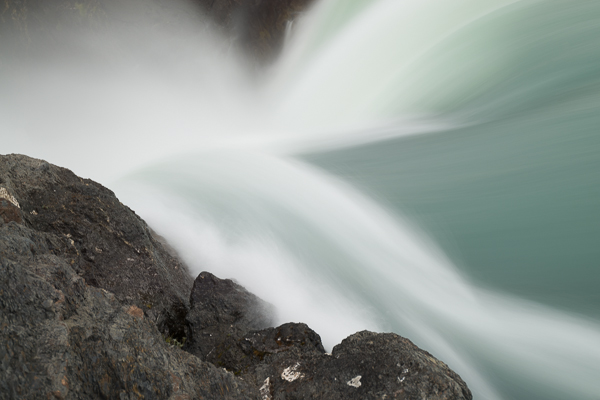
My favorite ND filter is the 7-stop Tiffen IRND 2.1 (which I think is an excellent bargain in terms of ND filters).  But even this filter, with has some IR control as part of its design, can result in magenta contamination.  Here’s a frame taken at the edge of a waterfall using this filter and my D800E, with the lens pointing almost straight down.  The resulting image is a worst case example.

 

The solution I’ve found:  close the camera’s eyepiece shutter.  No matter if mirror lockup is used, or the timer delay, or whatever…close the eyepiece shutter.  Under any circumstance, the D800/D800E cameras are very sensitive to light coming through the eyepiece, so closing the eyepiece whenever shooting from a tripod is a good idea.  In the above example, the eyepiece is open and positioned toward the sky.  Here’s another shot, same situation as the previous image, but with the eyepiece shutter closed.  Big difference.
 

Oldies

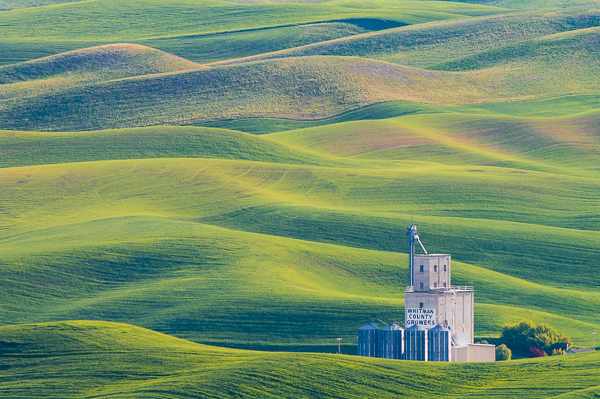
I’ve got an external hard drive I rarely access.  On that drive are files from years ago, some film scans dating back to the days of Photoshop 3, and images taken with a number of my earliest digital cameras.  A couple of days ago I was searching for an old photo, and ended up looking at those files.  I thought you might like to see some “ancient history,” a couple of images taken in 2004.


Wheat fields and elevator, Whitman County, Washington.
Nikon D100, Nikon 500mm lens.

Arctic tundra and frost, Denali National Park, Alaska.
Kodak SLR/n camera.

The Kodak SLR/n was a “high-megapixel” camera (13.5 megapixels) based on a modified Nikon N80 film camera body.  Not a very user friendly camera, it took Nikon lenses and was produced for only 15 months, from February 2004 until the end of May 2005.  Focal length metadata was not recorded by the camera, so I can only guess that this was shot with a Nikon 105mm macro.  Kodak also offered a version with a Canon lens mount, the SLR/c, although the body was based on a Sigma design.

File storage

Shooting digitally produces lots of files, which is turn creates the problem of how to store and access all these files.  Here’s how I do it.

For several years now I have used an external storage enclosure that holds five hard drives, each of which can be up to 2 TB in size.  It’s a reasonably small enclosure, 6 x 8 x 11 inches, has its own power supply, and connects to my desktop computer via one eSata cord.  I bought this box on-line from www.sansdigital.com, (the actual enclosure I have is the TowerRAID TR5M).  You might think this is a RAID configuration, but instead it’s set up as a JBOD (Just a Bunch of Drives).  When I power on the box, the drives show up as five separate, additional hard drives.

I file my images by year, date, and shoot name, renaming all my files to YYMMDD as I download.  Nikon lets me name my cameras so that a file from my D4 might be named something like 120621_D4N_3746 (YYMMDD = June 21, 2012; D4N = D4 Nikon; 3746 = file number generated by the camera).

I keep track of all my files with Lightroom, which is programmed using templates to automatically organize my files as images are imported.  My files are added sequentially by date and by shoot.  For example, there is a 2012 folder, which has subfolders by month and by shoot, such as an 03 Arizona  folder (pictures taken in Arizona in March 2012).  03 Arizona is then broken down into each day’s take, organized once again automatically by Lightroom.  If I do several locations the same month, these are labeled and named as 03.1 Oregon, 03.2 Arizona, 03.3 Utah, etc.

All files are stored in chronological order on the external hard drives.  Each drive has one master folder (Digital Images 1, Digital Images 2, etc.) for all the data on that particular drive, which makes reassociating drives much easier as I mentioned in an earlier blog.  As each hard drive is filled, I simply start adding files to the next one.  But all five drives are available at all time.  Click any image in Lightroom, and it is immediately available.

The hard drives are on sleds, and are hot-swappable.  The makes backup relatively easy, since I can insert another hard drive, copy any changes to this backup drive, and pull the backup drive out.  Note that I don’t want a proprietary backup format; I want a copy of the data.  I use ViceVersa Pro software to take care of this.  When Drive 1 has been backed up, I have no reason to back it up again, unless I make some change to a file on Drive 1.  I actually have two sets of backup hard drives, exact copies that is, of the working set of drives.  I rotate through these drive sets (working set becomes backup 1 set, backup 1 set becomes backup 2 set, backup 2 set becomes working set, etc.).  If any one hard drive goes down, I can plug in a copy of that drive and keep right on working.