Category Archives: Software

TILT/SHIFT OR FOCUS STACKING

I’ve received several emails asking about the differences between focus stacking and shooting with a tilt/shift lens.  Here’s the short answer: these are two very distinct techniques.  Focus stacking is a means of gaining sharp depth of focus (more near-to-far sharpness in the photo) while shooting at prime apertures.  Focus stacking can be done using any lens.  On the other hand, a tilt/shift lens is a specialized fixed focal length lens that permits changing where the plane of focus is positioned.  Nikon, for example, offers 19mm, 24mm, 45mm, and 85mm tilt/shift lenses.

To do focus stacking you take several images with your camera mounted on a tripod, all at the exact same exposure, but at different focus distances into the frame.  These shots must then be combined using software (my choice is Helicon Focus as it has a RAW IN – DNG OUT mode).  You’re basically getting a lot more depth of field, a lot more of the scene in focus, without resorting to small apertures and the resulting diffraction problems.  But, as always, there is a catch…or I should say, several catches.  The first is subject movement from frame to frame.  Software can fix some minor movement problems, but try photographing on a windy day and you’ll end up with a blurry stack.  Another problem happens when you have one frame with a close in-focus object positioned against a distant out-of-focus background, which has to stack with the reverse, the close object now out-of-focus but with an in-focus background.  The resulting stacked image often shows an obvious halo around that close object.  Focus stacking works best where there is a smooth transition of the subject you want sharp in the final composite image.  Just in passing, both Helicon Focus and Zerene Stacker, the two most popular focus stacking software programs, yield much better results that does Photoshop’s “auto-align, auto-blend” option.

Tilt/shift lenses do not give you more depth of field.  As I said above, they allow you to reposition the plane of focus.  And they are expensive.  Nikon’s 19mm, while a superb lens, is about the same price at a D850 body.  But using tilts means you can fight the wind, to get the shot in one frame rather than trying to put together several frames.  Use a tilt to position the plane of focus across a field of flowers, and a medium aperture works to cover the entire scene.  There is no software option that duplicates what a tilt movement does in a single frame.  As to shift — sliding the lens left-right or up-down — this effect can be accomplished in software by warping or distorting an image, but with the result of stretched pixels and the need to crop off part of the original image capture.  No big deal if you keep the resulting image small but certainly noticeable in a large print.  Tilt/shift lenses also allow you to use both tilt and shift simultaneously; the newer t/s lenses allow these movements to be in the same axis or at 90 degrees to each other.  As always, what’s best depends on your style of shooting, your subject matter (architectural work almost demands using a shift to avoid keystoning),  and what you want to do with your images.

My quick advice is to stick with focus stacking, or at least until you can verbalize a concrete reason to purchase a tilt/shift lens.  However, if you have GAS (Gear Acquisition Syndrome) and some expendable income I can easily imagine a tilt/shift lens in your future.

PHOTOSHOP CUSTOM MENUS

I was recently doing a Lightroom/Photoshop processing demo and got asked about the appearance of the menus in my version of Photoshop.  How come some of the menu choices shown on my laptop were highlighted with different colors?  And how come the menus on the attendees’ computers had more choices than I had?  The answer was simple:  I had customized the menu choices for my particular needs.

Photoshop has seemingly a million options in each of its menus, but having so many choices can easily become overwhelming and daunting.  Just how many of these choices do you actually use?  I bet there are a lot of options that you never use, especially since Photoshop was not designed specifically for us photographers.  Why not hide the items you don’t need, and highlight the select ones you use the most?  You can easily do this by using the custom menu editor.  How do you access this special option?  Sure enough, it’s one of those many (but often overlooked) menu items.  In Photoshop click on Edit and look down at the bottom of the drop down list.

Click on Menus to open the custom menu editor, and make sure it is set for Application Menus.  Click the triangle in front of File, Edit, Image, Layer, etc., and you will see all the menu items under that particular header.  Click on the color option to add or change the highlight color for each item.  Click on the eyeball, the visibility icon, to show or hide each item.


Note the second line at the bottom:  “Show All Menu Items” will be appended to the bottom of a menu that contains hidden items.”  Those hidden items are, of course, the very ones you turned off by clicking the eyeball icon.

When you’re done, click save or save as.

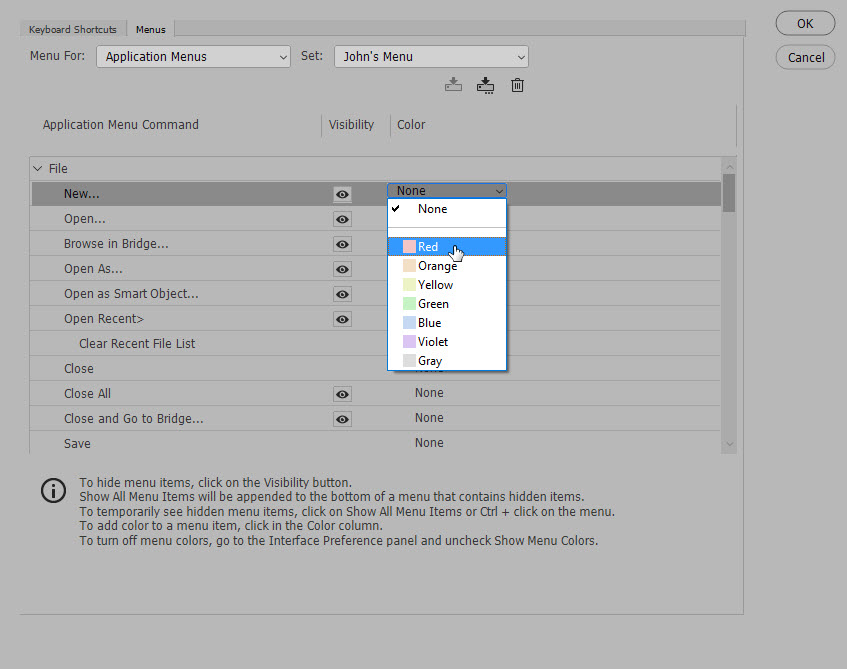
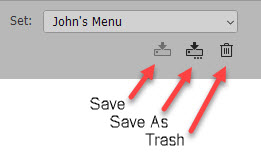
You can see that I saved my choices as “John’s Menu.”  You can switch back to the original Photoshop version at any time by selecting “Photoshop Defaults” in the “Set” drop down.  You can make as many custom menus as you want, although I don’t know why one would do this.  To delete a custom menu, select it in “Set” and then click the trash icon.

NIKON D850 LENS PROFILE PROBLEM?

Recently I was doing some night sky photos using my D850 and the Nikon 20mm f/1.8.  When I looked at the shots in Lightroom I noticed something odd: in the darker areas, especially toward the corners of the frame, a series of faint concentric rings were visible, apparently emanating from the center of the image.  I did not have any sort of filter on the lens, so this could not be some sort of interference pattern.  What was happening?

I started doing a lot of testing.  I finally discovered that these “rings” would disappear if I unchecked the “lens profile correction” in the Lens Corrections tab in Lightroom’s Develop module.

Was this a bad lens profile or what?  I considered some options:

  • I first noticed this while working on my laptop which has a high resolution 4K screen.  Was this just a monitor artifact?  I opened the same files on my desktop computer which has a much larger, but slightly lower res monitor.  Nope, the circles were still there when “lens correction profile” was on.
  • Was this only a factor of high ISO in dim light?  I needed some control shots, done in dim light.  With my camera firmly mounted on a tripod I snapped a series of images inside my garage with the garage door closed and the overhead lights turned off.  I kept the lens at f/2 and went from ISO 100 to ISO 12800 in one stop intervals, with shutter speeds from 30 seconds up to 1/4 second.  The rings were still visible in all the images when I turned on the “correction profile.”
  • What about shooting in more “normal” lighting conditions?  I went outside and shot a series looking down my street, at different exposure values and different ISOs.  I could not see any problem in the images when the profile was on or off.
  • What about aperture settings in dim light?  Back to the garage and another series of frames, this time done at ISO 6400 and apertures from f/2 to f/11.  No change, turn the profile on and the rings were still there in all the shots.
  • What this a problem with the 20mm?  What about other wide angle lenses?  More shots in the garage, this time with my Nikon 14-24mm.  As soon as the lens profile was applied in Lightroom I could see the rings, although fainter.  I also tested the only other wide angle lens I own, the Nikon 16-35mm, and the rings were back.  Again, if I unchecked “lens profile correction” the rings disappeared.
  • What about the lack of an anti-aliasing filter on a high-res body?  I no longer own a D800E or a D810.  I didn’t own the 20mm f/1.8 back when I had those cameras, but I did have night sky shots taken with the 14-24mm.  I pulled those up, looked at them carefully, and flipped the profile correction on and off.  No rings no matter if the correction was on or off.

What on earth was going on here?  Was this a problem specific to the D850?

Now totally frustrated, I looked at my Develop settings in Lightroom.  If sure would be great to be able to use those lens profile corrections to solve the distortion and vignetting problems that all wide angle lenses have.  I discovered that if I set the sharpening Amount slider to zero the rings disappeared, but in my normal RAW file workflow I generally do want to apply some sharpening.  Back at the Lens Profile tab, I left the “profile correction” on, but pulled the sliders for Distortion and Vignetting at the bottom of that tab to zero, effectively negating the profile.  Sure enough, the rings disappeared.  But wait…how about separating those two sliders, adjusting one but not the other?  The culprit seemed to be the Distortion slider.  I could have the Vignetting slider all the way to the right, as high as possible, but the moment I moved the Distortion slider from the zero position the rings started to show.

As I stated earlier, I’ve only seen this in very low light shots, and haven’t tried any tests with longer focal lengths.  Has anyone else shooting with a D850 seen similar results?  Right now I’m thinking that when I’m processing images taken with the D850 in very low light I will leave lens profile correction turned on, but pull that Distortion slider to the far left before slowly moving it to the right.

Nikon D850 Focus Shift

I’ve been using the Nikon D850 since October and can say I’m very impressed with the camera, particularly for my landscape work.  Two features in particular stand out:

  1. The “silent shutter” mode in Live View.  I should mention that I use Live View a lot when I’m photographing static subjects, and it’s a given that I’m working from a sturdy tripod.  In “silent shutter” the shutter is fully electronic — hence no shutter curtain movement at all — and of course when in Live View the mirror is up.  Eliminating the mechanical shutter and eliminating any mirror movement means eliminating two sources of possible vibration.  Turn on “silent live view photography” in the Photo Shooting menu, and select Mode 1 which gives a full-resolution, non-cropped image.
  2. The “focus shift shooting” option, also found in the Photo Shooting menu.  Here the camera takes a series of shots, slightly changing the focus point for each frame.  The resulting images can be “stacked” as a composite, thus increasing the in-focus area of the final photo.  This “stacking” must be accomplished with software in post-production; it’s not done by the camera.  The individual photos can be taken at a lens’s sharpest aperture, around f/5.6 or f/8, eliminating diffraction problems while yielding greater depth of field.

Turning on “focus shift shooting” gives you a number of choices:

  • The number of shots (up to 300)
  • The focus step width (1 through 10, undefined what these actually mean)
  • The interval until the next shot (between 0 and 30 seconds)
  • Exposure smoothing
  • Silent photography
  • Starting storage folder

Here are my choices, for landscape work:

  • Number of shots:  Set this to around 50, as the number really doesn’t matter.  The camera will stop with the lens focusing ring hits the end of its travel.  I have my camera set at 50 and most of the time the actual number of usable frames is between 5 and 10.  FYI, you will often find some extra frames where the camera has gone before the far point in your composition, so nothing is in sharp focus.  No big deal, just delete these frames when you see them later on your computer.
  • Focus step width:  I have mine set at 2, as I want to work at those prime apertures on my lenses, so I want to make sure each frame’s depth of field overlaps with that of the preceding or following frame.
  • The interval until the next shot:  I have this at 0.  And VR is “off” on the lens in use.
  • Exposure smoothing:  Off, as I do all my focus stacks in manual exposure so that all the frames already match in total exposure.
  • Silent photography:  On.
  • Starting storage folder:  I don’t use this.

So here is the easiest way I know to work.  Leave “silent shutter in Live View” turned on.  Add “focus shift shooting” to My Menu, and position it as the top most listing.  In the Custom Settings menu, Custom Control Assignment (choice number F1 in Custom Settings), set the Fn2 button on the camera rear to “access the top item in My Menu.”

In the field, turn on Live View, compose your image, set the exposure, and focus on the nearest past of the frame.  Press Fn2, select Start, and the camera begins shooting in silent mode.  When you’ve done this once, if you don’t need to change any options, the next time you can just press Fn2 and then OK twice.

Just to cover yourself, shoot several stacks of any one composition.  How to tell where each stack beings?  Wave your fingers in front of the lens and shoot one frame in Live View before you push Fn2.  Important reminder (and I speak from experience here):  remember to refocus on the closest point for each stack.

OK, now to the actual stacking.   I’m assuming you’re shooting RAW files, and you are, right?  You could use Photoshop.  If so, you need to first process the individual images and then open them as layers in Photoshop.  Select all the layers and do Edit > Auto align followed by Edit > Auto blend.  This method works OK, but there are two problems:  the final file is no longer a RAW file, and with complex subjects you will probably discover a number of stacking artifacts (blurry areas, that is).

In my opinion, a better choice is to use a separate stacking program and I would recommend Helicon Focus.  Google for a discount code to knock the price down about 20%.  Helicon works directly from Lightroom, and if you install Adobe’s free DNG Converter, Helicon has a mode called Raw In – DNG Out.  You export the selected images from Lightroom to Helicon in their original RAW state.  I’ve found that almost all the time running Helicon at its default settings works fine.  Most of the time Helicon’s rendering intent mode B is my choice.  If it leaves artifacts I try mode C.  When Helicon finishes, the resulting file can be saved right back into Lightroom as a DNG, and processed to taste as you would any RAW file.

NIK

In case you missed this, it’s now official.  The Nik suite of plug-ins will not be developed in the future.  From the banner at the top of the Nik website:

“We have no plans to update the Collection of add new features over time.”

The collection is still free to download and use, but the real question is about compatibility in the future, with either Photoshop/Lightroom upgrades or changes in Windows and Mac core OS versions.

TECH TALK: LIGHTROOM/PHOTOSHOP

This post is going to be a bit techie.  OK, don’t say I didn’t warn you up front.

I was surfing the Web recently and ran across a blog post by a well know photographer who does not use Lightroom.  One major point made in the post was the question of why would anyone use Lightroom at all (aside from its cataloging feature) since Lightroom shows percentages for R, G, and B values,  Yes, mouse over an image in Lightroom’s Develop module and the readout is indeed in percentages.  Other RAW file converters show numerical values of 0 to 255 for each of the color channels.  Doesn’t this make using one of those converters better than working with Lightroom?

Most RAW conversion software makes you select a color space.  For example, let’s consider Adobe Camera Raw (ACR).  ACR is a separate program, accessible from Photoshop or from Bridge (which you now have to download from Adobe, rather than it being automatically included with Photoshop).  Bridge is a browser, the same as Window’s Explorer or Mac’s Finder, while Photoshop is a pixel editor.  ACR is a separate in-between software program.  When you open a RAW file in ACR, it needs a color space to use.   In simplistic terms, a color space is a group of colors out of all possible colors.  Remember when you were a kid and your parents bought you a box of crayons?  There were different boxes available, holding just 8 crayons up to 64 crayons.  Yep, more crayons, more possible colors.  No matter how you worked with the 8 crayons, you could never have the possible options and mixtures that the big 64 crayon box held.  It had a larger color space.  The basic digital color spaces are sRGB, Adobe RGB, and ProPhoto RGB.  Think of these as small, medium, and large.  Open an image in ACR, and immediately below the image window is a clickable link:

Note that the default is sRGB, the “small” color space.  Click on this link, and Workflow Options opens where you can select the color space and bit depth you want.

Whatever you select, make this your RGB working space over in Photoshop’s Color Settings (you might notice that the default in Photoshop is also sRGB).  Personally I use ProPhoto RGB in both ACR and Photoshop.

OK, so we finally get to where Lightroom differs from other converters.  You ever notice that Lightroom does not offer a choice of color spaces?  Internally it uses a variety of ProPhoto RGB.   But Lightroom differs from those other converters because it is a parametric editor.  OK, so what’s that?  In simple terms, it sums up processing instructions, which are not applied to an image until that image is either converted or exported through that instruction set into an actual editable file format.  Open an image from Lightroom into Photoshop, and it is no longer a RAW file.  A file in Photoshop can’t be saved out as a RAW file, but only in a standard graphics file format.

Well, at last we’re back to the question about those R,G, and B percentages.  Because Lightroom does not assign a color space, it cannot show numerical RGB values, since those numerical values depend on the color space in use.  Open a RAW image into some other converter besides Lightroom, mouse over the image, and read the RGB values for any one spot.  Now switch to a different color space.  The RGB readouts for that same spot will be different.  You have to specify a color space to talk about RGB numerical values.  Do I really care about this one way or the other?  No, not at all.  Photography is a visual art, not a bunch of numbers.  Use a quality calibrated monitor, look at the image, and adjust to taste.

In that same blog post I mentioned it was implied that not using Photoshop was a big mistake.  Well, I partially agree.  Photoshop does allow workflow options, such as layer masking and luminosity selections, that no RAW file converter currently allows.  But wait, this is not an either/or question.  It’s not a choice of Lightroom or Photoshop no more than it is of DPP or Photoshop, or of Nikon Capture or Photoshop.  Personally I find Lightroom’s user interface incredibly easy to use, plus I use the database feature to catalog all my image files.  But I also want Photoshop for fine-tuning images.  For me it’s a combination of Lightroom and Photoshop (and a calibrated monitor).

LIGHTROOM CC: ADDITIONAL HDR INFO

In my last post I should have mentioned one important fact about the new “merge to HDR” feature in Lightroom.  When working on the resulting DNG file in Lightroom, the exposure slider now offers plus/minus 10 stops of exposure, a 20-stop exposure range, double the standard amount.  This is reminiscent of working with HDR Pro in Photoshop; see my August 2014 post entitled “HDR (A DIFFERENT WAY).”

LIGHTROOM CC (LIGHTROOM 6)

Lightroom CC was announced today.  If you’re like me and have subscribed to the photographer’s Lightroom and Photoshop package, a notice should appear in your desktop Creative Cloud app.  Adobe’s servers are swamped, so this might take a while.  The new Lightroom is also available as a standalone perpetual license program.

Downloading and installing the new version of Lightroom was easy for me.  No problem, until I tried to open the new program.  I clicked on the desktop icon, and nothing happened.  If this is your experience, there is an easy fix:  sign out of your Adobe account via the “preferences” in the desktop CC app (click on the gear icon or the drop down triangle in the upper right) and sign right back into your account.


Lightroom CC has two new features which are of interest to me.

1.  A brush tool option has been added within the graduated filter.  Add a grad just as you did in earlier versions of Lightroom, and then select the brush option within the grad filter, hold down the Alt/Option key, and brush over the image area where you do not want the grad filter applied.  Hey, it’s an editable filter!

2.  Merge to panorama can now be accomplished within Lightroom.  This can be done using RAW files, and the composite image is saved as a DNG file…which means that the resulting pan image is still a RAW file, and can be processed non-destructively in Lightroom.  Select the files you want to merge into a pan, and do Photo > Photo Merge > Panorama. Lightroom does the merging, and saves the merged panoramic in the same folder as are the component files.  It does add -Pano to the end of the combined image’s filename, a feature I’m not really keen about.  I’ve always worked by selecting the images in Lightroom, then opening them in Photoshop to merge images into panoramics, and finally doing a “save as” while added a P_ at the start of the pan’s filename.  I’ve got a smart collection in Lightroom which automatically sorts out all my panoramic images, all the files that have a filename starting with that P_.  OK, so now I’ll add another smart collection, this one to find all the images with filenames that contain Pano.

Lightroom CC also has a new merge to HDR feature, but that’s no big deal for me as I rarely no any sort of HDR.  However, I’m certainly open to playing around with this feature.  Face recognition is also now included, and I’m sure a lot of folks will be pleased with that.  There are also some nice additions to the slideshow module.  I’m sure I’ll discover more as I start using the program, but my initial experience is quite positive.

And one more good point:  all in all, the program runs faster than before.

I highly recommend you go to Adobe’s website and view the videos by Adobe Evangelist Julieanne Kost.  Go to https://www.adobe.com/products/photoshop-lightroom/features.html?promoid=KSKBF and click on the See how it works buttons in the Lightroom CC section.

Be sure to watch her video on some of the other new features:  https://www.youtube.com/watch?v=1GZErV1m1uQ.

Lightroom — ACR difference

I’m a big fan of Lightroom, and use it as my RAW file converter.  Adobe Camera Raw is essentially the same, but there is one small difference which, for me, is a reason I prefer Lightroom over ACR.  That difference lies in how the two programs allow the user to adjust contrast.

Both Lightroom and ACR incorporate a contrast slider, and in both programs the slider does exactly the same thing.  Watch the image histogram as you drag the slider left or right, and you’ll see both ends of the histogram move simultaneously, expanding or contracting the histogram.  OK, no difference here between LR and ACR.

But go to the Tone Curve, which I prefer to use, and the two programs operate slightly differently.  Both Lightroom and ACR offer two views of the Tone Curve, a Point Curve (where you place points on the curve and move those points), and a Parametric Curve (where the tone curve is divided into sections and adjustments affect that region).  The Targeted Adjust Tool — which allows you to mouse over your image, click on a spot, and drag to adjust — is available in both Lightroom and ACR.  In the Parametric Curve, in both programs, one point can be set on the curve.  You cannot set two points close to each other (for example, two points in the highlights sections, or two points in the shadows).  But go to the Point Curve, and here lies the difference: you cannot use the Targeted Adjustment Tool in ACR when in the Point Curve.  Try to do so, and it affects the Parametric Curve.  In contrast, Lightroom allows using the tool in the Point Curve.  As you mouse over your image using the tool, a “ball” appears on the curve indicating where the point under the tool will fall on the curve, so you can set multiple points exactly.  ACR does allow placing multiple points on the curve, but it does not indicate where any one tonal value falls on the curve; you’re guessing at the precise position on the curve.

Two precisely set points on the Tone Curve, using the Targeted Adjustment Tool in Lightroom.

Nikon Scanner

Yesterday I had to scan a Velvia slide from my files.  Yes, for those of you don’t remember the “old” days, there was a thing called “film” which had to be digitalized before you could use Photoshop on the image.  A film scanner was the answer.  But, a dedicated 35mm film scanner (rather than a flatbed scanner with a film holder) is now quite a rare beast.  I’m not sure such a thing is even manufactured any more.  I have a long discontinued Nikon Coolscan 4000, which is certainly adequate for magazine-sized reproduction.  The problem, however, is getting the scanner to work with any current computer operating system.

I’m running Windows 7 64-bit on both desktop and laptop machines, but Nikon scanner software was written many years before this OS.  I guess I could have kept an old computer around, but no thanks, I don’t want to do that.  So how have I been able to use my scanner — infrequently though I do — along with Nikon Scan software on my current machines?  Ah, Google to the rescue.  Type in “how to use a Nikon scanner with Windows 7 64” and this link appears (there are other links but this is the one I used):

Follow the directions, and all is well.  Don’t have Nikon Scan software?  It’s still available for download directly from Nikon’s website.