Author Archives: John

2017

You have probably noticed that I have not written anything for quite a long time.  Right now I’m not sure whether I will or will not continue this blog.  For me, this year has been simultaneously very good and very bad. You might remember the “best of times, worst of times” opening line from Charles Dickens’ Tale of Two Cities.  The actual full sentence reads:

“It was the best of times, it was the worst of times, it was the age of wisdom, it was the age of foolishness, it was the epoch of belief, it was the epoch of incredulity, it was the season of light, it was the season of darkness, it was the spring of hope, it was the winter of despair.”

Photographically this has been a great year for me.  I think I’ve taken some of the very best photos of my life this year.  And I’ve recently started working with the new Nikon D850, which I consider to be by far the best Nikon camera I’ve ever used (and I almost hate to admit just how long I’ve been a Nikon shooter, going all the way back to my very first Nikon camera, a Nikon F Photomic that I bought in my sophomore year of college).

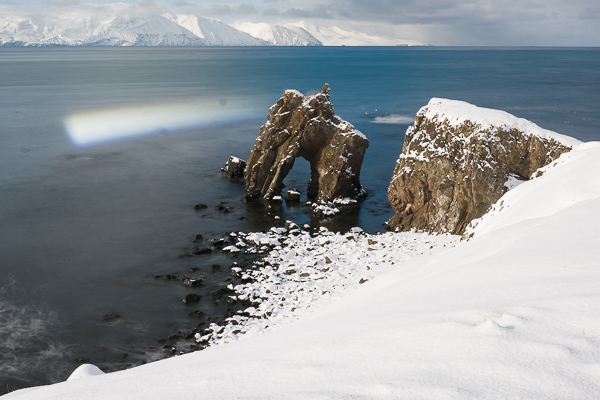
I’ve continued to travel widely.  I’ve made a few of what I call my “last-time trips,” repeat trips to the exact same locations at the exact same time of year, journeys that I do not plan on repeating one more time.  These destinations include Japan in winter (snow monkeys, Steller’s sea eagles, red-crowned cranes, winter landscapes), Iceland in winter (frozen waterfalls, glaciers, icebergs on black sand), and, starting a week from now, the sub-Antarctic islands and the Antarctic Peninsula.  I’ve done each of this trips multiple times, and simply want the opportunity to photograph other locations during the same time frames.

Yes, the best of times has been very good indeed.  I’m in pretty good health, still mentally functional (although that’s always debatable), still an avid and compulsive book reader, and just as curious about the world as I’ve always been.

So what’s this “worst of times” bit?

First a bit of background info.  I came of age in the civil rights movement of the 1960s.  Yep, that just gave you a hint about my age.  I was involved in the Vietnam era, and the Nixon debacle.  But over all these years I believed America would become a better country, a better people.  I felt truly blessed to be an American.  I love this country.

And then 2017 happened…and I started needing to apologize for America during my travels abroad.  Environmental regulations rescinded, climate change denied, immigrants demeaned and threatened, civil rights ignored, white supremacy in the open and applauded, politics by 140 characters, and facts called fiction with no objective truth allowed.  I’ve become extremely pessimistic during this year about the future of our country, and, for that matter, pessimistic about the continuation of human life on this planet.  Nuclear war is not a casual option to be dismissed in the same cavalier manner in which you would a sports rivalry.

So an enormous split in my life has developed: on one hand, I’ve never been more pleased with my photography and have never felt closer to my friends and loved ones.  On the other hand, I’ve never been more frustrated with, and mortified by, the social and political scene.

Yesterday Robert Mueller revealed charges against three former Trump campaign officials.  Is there a glimpse of the proverbial light at the end of the tunnel?

NIK

In case you missed this, it’s now official.  The Nik suite of plug-ins will not be developed in the future.  From the banner at the top of the Nik website:

“We have no plans to update the Collection of add new features over time.”

The collection is still free to download and use, but the real question is about compatibility in the future, with either Photoshop/Lightroom upgrades or changes in Windows and Mac core OS versions.

Tilt

A regular lens on a DSLR can be focused near or far, but the axis of the lens is always at a right angle to the sensor.  The plane of focus (the slice of space that is in sharp focus) is always parallel to the sensor in the camera.  No matter what, there is only one plane that is in absolute sharp focus, but apparent sharpness can be increased by using a small aperture to increase depth of field.  With a regular lens, if you need more of the image in a single frame to appear in focus your only choice is to shoot at the smaller apertures.  This has two major drawbacks: (1) smaller apertures mean slower shutter speeds.  Try to photograph a field of flowers where you need f/22 for enough depth of field, but f/22 in turn means a shutter speed of 1/15 second, and that’s not fast enough to stop wind movement.  Upping the ISO means the probability of increased noise.  And (2) while you gain depth of field, small apertures introduce diffraction problems, reducing sharpness.  Current high megapixel cameras, with their ability of record small detail, will all too readily show diffraction.

The solution is to reposition the plane of focus, to re-designate where it lies, and in order to do this you need a tilt/shift lens, which allows the front part of the lens to be moved compared to the sensor plane.  The lens plane and the sensor plane no longer have to be parallel, but can be angled or displaced relative to each other.

Now, a bit of theory.  Imagine three planes extending infinitely: the plane of the sensor, the plane of the subject (the part of the image where you want focus to fall), and the plane of the lens.  With a standard lens only two of these planes can ever have a common intersection, because the plane of focus is always parallel to the sensor.  But if you can tilt the lens all three planes can meet in a common intersection and a photographic miracle happens as now the focus plane has been repositioned.

You will often hear that using a tilt creates more depth of field.  Not true.  What a tilt movement does is reposition the plane of focus so that it no longer lies parallel to the sensor.  This in turn creates a wedge-shaped depth of field which increases further away from the camera.  By repositioning the plane of focus, by tilting the lens, part of the image closer to the camera will be in focus and part of the image further away will be in focus simultaneously.  Depth of field is always on either side of the plane of focus, with less depth of field at close focus distances and more depth of field at far focus distances, hence a wedge shape.  A really common belief is that using tilt movement will bring everything in a photo into sharp focus.  Sorry, not true; you still need to stop down.  The amount of tilt does not control depth of field, the aperture choice does that.

First you need to decide where you want to position the plane of focus.  You always tilt the lens TOWARDS this plane, no matter the orientation of the camera body or the subject.  But how do you figure our how much to tilt?  How do you actually set focus?  Setting a Nikon or Canon tilt movement is not the same as how you would work a tilt movement with a view camera due to the differences in the rotational point of the DSLR lenses.  A lot of what you read on the Web applies mostly to view camera work.

So…step by step, here is what I do.

  1. Decide on the most important plane of my subject, where I want to position the focus.
  2. Chose a near point and a far point in this plane of focus.
  3. Set the tilt on my lens to zero (no tilt at all).
  4. Focus on the near point.
  5. Without refocusing, slowly tilt toward the far point until it appears in sharpest focus, and lock the tilt movement.  The near point is now out of focus.
  6. Without changing the tilt, refocus on the near point.  The far point is now out of focus.
  7. Unlock the tilt movement, and slowly move the tilt in the opposite direction than done earlier until the far point appears in sharpest focus.  De-tilting, if you will.
  8. Repeat steps 5, 6, and 7 if necessary until both near and far appear in focus.
  9. Lock the tilt movement of the lens, and trim overall focus if needed.
  10. Select the aperture needed for depth of field.

The two biggest problems I see when people first use tilt/shift lenses are (1) working way too fast — using a tilt/shift lens should be slow and methodical — and (2) dialing in far more tilt than needed.

MY MISTAKE

Every once in awhile we all make dumb mistakes…even though we know better.  Recently I was in Iceland and was using my 24-70mm f/2.8 Nikon lens ( the “old” non-VR version).  I’ve owned this lens ever since it came out but I rarely carry it any more, as I prefer the 24-120mm f/4 for travel.  I had the f/2.8 lens with me in Iceland on the off chance I might need that faster aperture for some night photos.

I’ve known for many years that the 24-70mm has a minor flaw that only shows up when the lens is used in a unique non-typical photographic situation.  It has a light leak, through the little plastic window that shows the focusing distance.  This leak affects the image only when there is a strong light source directly hitting the window coupled with a long exposure time, a combination that most photographers do not experience.  How long have I known about this?  Well, just Google “light leak Nikon 24-70mm” and you’ll find links going back to 2010.

The solution is really simple: cover the plastic window with a small bit of gaffer’s tape, which is exactly what I did way back when.  But at some point in time, for some reason I don’t recall, I removed that tape and forgot all about the possibility of a problem.  And then in Iceland I used the lens in the exact “not typical” situation: strong sunlight hitting the window coupled with a 10-stop ND filter to slow the shutter speed to 15 seconds at f/14 and ISO 64.  Here’s the result:

Nikon 24-70mm light leak.

I use Live View a lot for landscape work, so I immediately saw the light streak across the frame.  Hello John, remember this?  I keep a few strips of gaffer’s tape stuck on the inside of my camera pack, so I ripped off a small section and covered the little window.  My first rule of life: don’t be dumb.

TRIPOD SNOWSHOES

A few days from now I’ll be at Crater Lake National Park for some winter landscape work.  Crater Lake is a reasonably short drive for me, so I can easily coordinate the timing of my trip with the weather.  I want fresh snowfall and no wind.  One thing is sure: as usual for this time of year there is already a lot of snow on the ground.  A quick online check tells me that as of today there is 72 inches of snow at the headquarters building and a lot more at higher elevations.  I’ll need my snowshoes so I don’t disappear into the drifts, but what about my tripod?  How do I keep it from sinking into the snow?

While you can purchase readymade tripod snowshoes, it’s quite easy to make your own set for just a few dollars.  I did this years ago, and the first ones I made still work just fine.  Head to your local home improvement store and purchase the following:

  • Three slip-on furniture-leg tips (also known as crutch tips) in a size just large enough to slip snugly over your tripod feet.
  • Three one-inch long bolts, the nuts for them, and six flat washers that fit the bolts.
  • Three flat plastic test caps (look in the plastic pipe section).  Mine are for 4-inch pipe and cost around $1 each.

Drill a hole through the center of each leg tip, and through the middle of each plastic test cap.  Take a bolt, add a washer, and thread it through the hole in the test cap, then add a second washer and nut and tighten.  That’s all there is to it.  Make three of these, shove them over the tripod feet, and you’re good to go.  Just as you will sink a little into the snow when you’re wearing snowshoes, your tripod will also, but it won’t sink out of sight in powder snow as it would otherwise.  In deep snow start with the tripod legs less than fully spread.  As you push the tripod down into the snow, the snow itself will force the legs apart.

A well-used tripod snowshoe.

COMPARISON

I recently ran across a blog post where a photographer was complaining about how much “space” his Nikon D810 files consumed, and how “costly” this space was.  Really?  I’m not exactly sure what this photographer meant, but let me take a slightly tongue-in-cheek look at “space” and “cost” today, compared to the same in the film days.

I store my digital files on hard drives.  I just checked the B&H website and a 4TB Western Digital external AC powered USB3 drive is currently priced at $119.  A 4TB drive will hold roughly 90000 D810 RAW files.  Assuming that files are processed, I’ll cut that number in half as the drive’s capacity for final images.  So, 45000 images fit on a drive that is roughly 6.5 x 5.5 x 2 inches.

Back in the film days my slide storage solution involved standard office four drawer file cabinets.  Each drawer could hold about 5000 slides in archival 20-slide pages, groups of 10 pages dropped into a single hanging file folder.  So one cabinet = 20000 slides.  Let’s cram a few more pages into each drawer, and say that 45000 slides could fit into two file cabinets.

OK, two four drawer file cabinets:  $200 (about $100 each back then, quite a bit more today).

100+ hanging file folders per cabinet:  $40 or so.

45000 slides held in 20-slide pages means 2250 pages.  B&H still sells these, currently $7 for a pack of 25.  I’ll knock this down to $5, so $450 for pages.

Add in the cost of film and processing:  45000 slides @ 36 shots per roll = about 1250 rolls of film, and at a ballpark figure of $10 per roll total cost that’s an additional $12500.

Total expense:  somewhere around $13300.

Those two file cabinets take up a goodly space:  52 x 30 x 22 inches when placed adjoining.

So…$119 and 71.5 cubic inches versus $13300 and 34320 cubic inches.  And I’m not even going to mention the difference in weight between one external hard drive and two fully loaded file cabinets.

Nikon D500

In the comments to my previous post several persons asked how I like the D500, now that I’ve been using it for some time.  So here goes….  My quick and easy answer: it’s the best “crop” body that Nikon has produced, particularly if you’re a wildlife shooter who wants the extra “reach.”

The D500 specs are readily available so I won’t repeat them here, but in my opinion there are some standout points:

  • Very fast AF.
  • 10 fps second motor drive rate.
  • 20.9 megapixels (which is more than the D810 when the D810 is used in the equivalent DX mode).  The D500 also offers just over 12 megapixels when used in its 1.3 crop mode.  I mention this point as the result is about a 2X view compared to a “full frame” camera while the resulting file size is roughly the same as from a D3 or D300.  Times have definitely changed.
  • Expanded buffer.  The buffer size depends on the card in use, but it’s roughly 40~45 RAW frames with a fast SD card, and 200 shots with an XQD.  Anyone remember the D100?  I think its buffer was about 3 RAW shots.
  • A minor but very handy feature:  button illumination for low light conditions.  To use, pull the Power Switch to the right, to the light bulb icon.

I try to keep the ISO at 1600 or lower, but I will go to 3200 knowing that the files will need some extra noise reduction help.  Of course, if there is a chance to grab a shot of Bigfoot, or if you’re only posting to the Web, then the sky’s the limit.  For my purposes, if I really need high ISOs I’ll switch to my D5.

Make sure to turn airplane mode ON in the setup menu in order to conserve battery power, otherwise the camera will continuously search for a Wi-Fi connection.

Forget about using off-brand batteries, or the older Nikon EN-EL 15 ones marked Li-on01.  In case you missed the announcement, Nikon will exchange these for new Li-io20 batteries at no cost, so long as you include a copy of your D500 sales slip.

And I’ve become a fan of using the Info button to modify settings…or perhaps the larger type on the LCD screen is simply easier for my old eyes to read.  What I really like is being able to change fill flash levels when I’m using a Better Beamer equipped flash on a RRS or Wimberley bracket.  With the flash active, touch the Info button, hold down the “minus” button the left side of the LCD, and a “flash mode/compensation” option appears, which includes indicators of which command dial to turn.  Total control from the camera, no need to reach the flash unit itself.

Am I getting rid of my D810 bodies?  No, not at all.  In my opinion, the D810 is still the best all-around camera there is.  But for action/wildlife the D500 is hard to beat.

For a longer review, I highly recommend you watch Steve Perry’s D500 YouTube video found here:  https://www.youtube.com/watch?v=ComPpr0bniM&t=5s.  For that matter, do yourself a favor and check out all of his videos.

It’s been a while…

It’s been quite a while since I wrote a blog piece.  A lot has happened this summer and fall.  Back in April I added a D5, and then a D500, to go along with my D810 cameras.  I made extended trips to Iceland, the Galapagos, Spitsbergen, Brazil, and southern Utah.  On the home front, at the beginning of summer we contracted a major house remodeling project which still isn’t quite finished.

And then there was the accident.  Several months ago, while driving home, I was slowing for a traffic light with three or four cars in front of me.  Just as I was almost stopped, the truck in back of me failed to brake and, while still going about 35mph, smashed into my vehicle.  This shoved me into the SUV directly in front of me.  My vehicle, a full-sized Chevy 4×4 pickup with a popup camper on the back, was totaled, smashed both front and rear.  The guy who hit me had been talking on his cell phone, totally distracted.  I’m all OK now, but it has been quite an experience, one which I definitely do not want to repeat.

UPDATE November 25:   I certainly appreciate all the comments and concerns.  Yes, I’ve totally recovered now, at least as good as I’m going to be at my age.  Plus I have a new truck and repaired camper.  So…if you see a white Chevy extended cab 4×4 pickup with a Four Wheel Camper popup in the back and a geezer at the wheel, stop and say “hello.” Again, my thanks to everyone.

END OF AN ERA

After a lot of procrastination, I’ve started sorting through about 25 years of old film images.  I haven’t shot one frame of film in over ten years now (I don’t even own a film camera anymore).  To be honest, it’s an extremely rare day when I have any reason to search for a film image…so a major housekeeping project has finally begun: I’m getting rid of as much of my film archive as possible.

I have seven four-drawer file cabinets crammed full of 35mm slides stored in 20-slide archival pages, ten pages to a hanging folder.  These are sorted into broad categories, such as birds, mammals, national parks, autumn color, etc.  I’ll be going through each section and pulling the shots I think worth keeping.  In the film days we all shot and kept duplicates of the exact same image, as multiple originals were needed to send out to magazines, books, calendars, and other possible publications.  Even having just started on this project, I’m amazed at what I kept way back when.  Yes, there are some good images, but there is also a lot of stuff that should have been ditched back at the time.  As I look through the files, I keep saying to myself “If this is what you kept, just how bad were the images you threw away?”

While the bulk of my film work was done with 35mm Nikons, I also used a Fuji 6x17cm panoramic camera for several years, and two 6x7cm medium format cameras, a Pentax 67 and a Horseman roll film view camera.  OK, there’s another whole file cabinet full of mounted images.

I’m hoping to get all this down to one file cabinet filled only with “keepers,” although that might take several passes through the files.  All the tossed film is going to a professional shredding place.

But I still have all the peripheral stuff: slide pages, labels, mounts, protective sleeves, and several large light tables.  Plus slide projectors and slide trays.  Anyone want this stuff?

Just a start: a wastebasket full of mounted 6x17cm panoramic images.

NIKON D5 AUTOMATIC AF FINE-TUNE

Yes, I bought a D5 to use as my action/fast AF/high ISO camera.  My D810 bodies will continue as my landscape/lower ISO cameras.  I’ve had the new D5 all of two days now, but I’m already getting emails about one feature: how to use the automatic AF fine-tune.  OK, so here goes…and to make it work you need to follow these steps precisely.

  • You need a flat target with distinct high contrast printing.
  • Mount your camera on a sturdy tripod, on a hard surface floor, with the target parallel to the camera back.  Have the camera/target distance about 25 times the focal length of the lens you’re using.
  • Turn off VR.
  • Set the AF mode on the camera to AF-S.
  • Have the Movie Record button set to None (in Custom Settings f1)
  • In Custom Settings f2, set the multi-selector center button > shooting mode > reset > select center focus point.
  • Turn on AF fine-tune in the Setup menu, with the default value at 0.  Leave AF fine-tune turned on from now on.
  • Turn on Live View (make sure the Live View selector switch is set to camera, not video), and select the center focus point by pressing the multi-selector center button.
  • Autofocus on the target using either the shutter button or AF-ON button, and make sure the focus box in Live View turns green, indicating that focus has been achieved.
  • Hold down the AF-mode selector and movie-record button simultaneously, and keep them pressed until a message appears on the LCD (this should appear in about two seconds).  Make sure YES is highlighted, then press the OK button.
  • When a second dialog message appears, press OK again.

That’s it.  Easy.  It took more time to write this out than to do the actual process.

And I now have two D4 camera bodies for sale.  Both in great shape, will all the goodies from Nikon.  Make me a reasonable offer for either (or both!).