Lightroom 5: Visualize Spots

Lightroom 5 introduced an extremely useful feature called Visualize Spots.  However, during my recent workshops I’ve discovered that quite a number of Lightroom users are not aware of it.  Visualize Spots does exactly as its name suggests; it shows you all the dust spots on your image, including many that you might otherwise miss.

In the Develop module, make sure the Toolbar is visible below the image (tap the T key to toggle the toolbar on or off), and set your image view at 100%, or 1:1.

Navigate to the upper left corner of the image (hold down the spacebar, and drag the image), then activate the Spot Tool.  The Visualize Spots checkbox now appears on the Toolbar, at the bottom left.

The image changes to black and while, and all those dust bunnies show up.  Move the Visualize Spots slider to increase or decrease the sensitivity, and start spotting.

Page Down (PC: PgDn; Mac: Function + down arrow) moves the image down by exactly one screen view.  When the bottom of the image is reached, do Page Down again, and the screen image moves over and up to the top.  Keep doing Page Down, until you’ve covered the entire image.  This Page Down trick means you’ll never miss any section of the image.

Nikon D800 Action

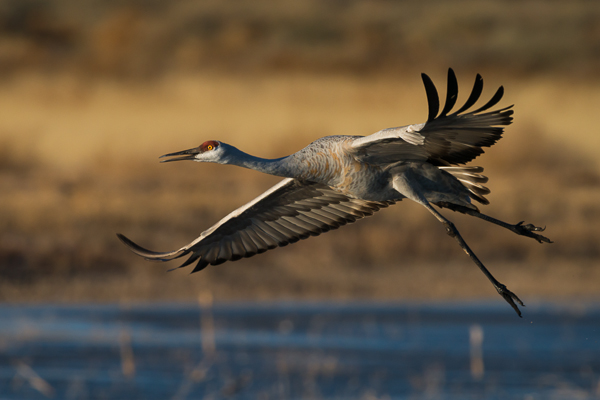
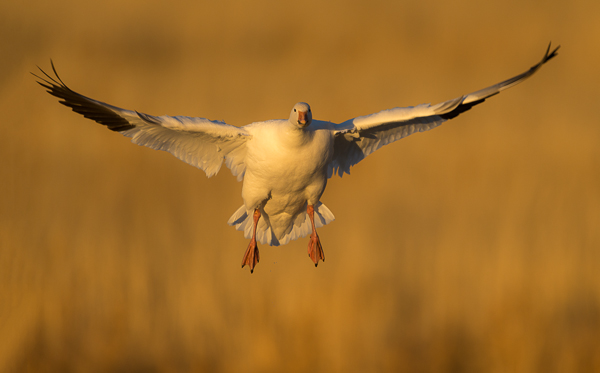
I read this question time after time on Web forums:  “Can the Nikon D800 be used for wildlife photography?”  Well, why not?  Here are two full frame images taken last week during a short stop I made at Bosque del Apache.  Both images: D800E, Nikon 600mm, ISO400, early morning light.   FYI, I don’t have the extra battery pack for the camera so the motor drive rate is 4 frames/second.   Anyone else remember when 4 frames/second would have been considered pretty amazing?  Remember winding film with your thumb?


Cottonwoods

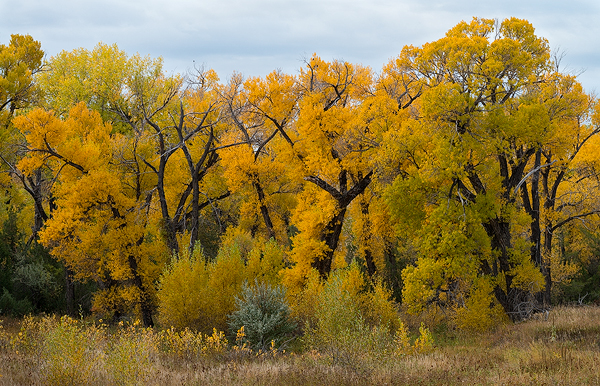
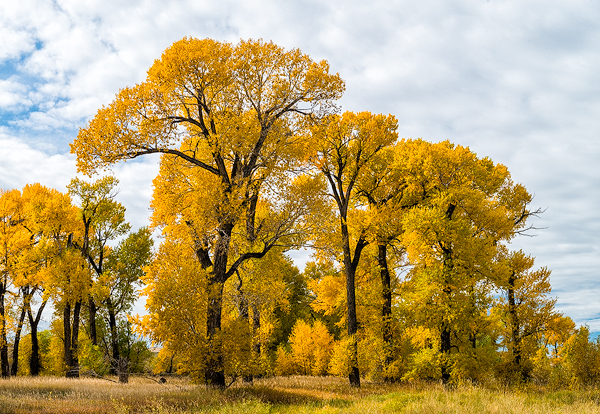
I really enjoy photographing autumn color.  In the mixed hardwoods of the eastern US, the beech/maple/oak forest, the trees present a wash of color, even a painterly effect.  Not so on the high plains and prairies.  Here the autumn color is that of the cottonwood trees, which line every local water source.  In contrast to the mixed reds and oranges of the eastern autumn, cottonwoods show only one color: yellow gold.  But be out photographing when the trees hit peak color, and the intensity is overwhelming.  Here are a couple of shots from two weeks ago in central Montana.  No, I wasn’t intentionally there to photograph the cottonwoods, in fact I was just passing through the region headed elsewhere, but who could resist?


Elephants

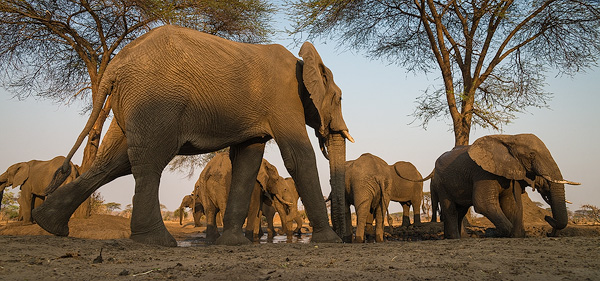
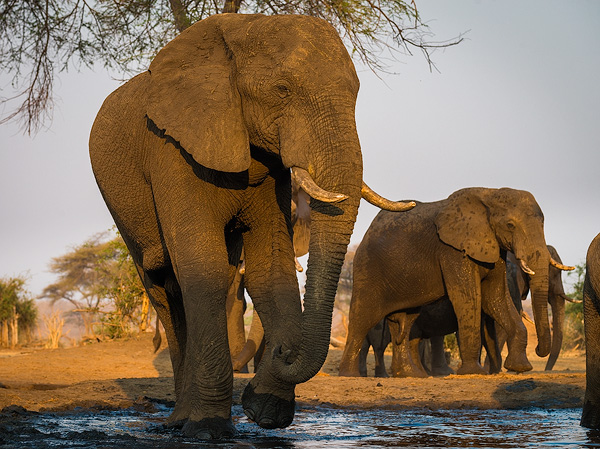
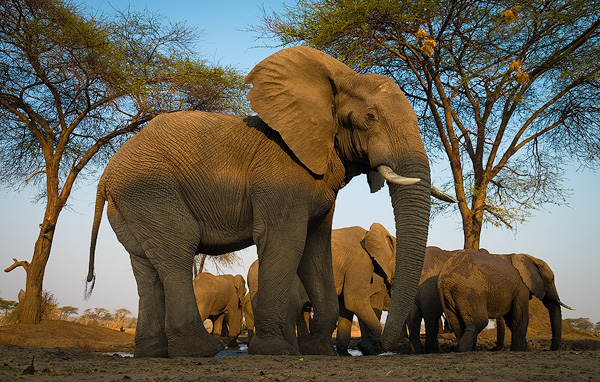
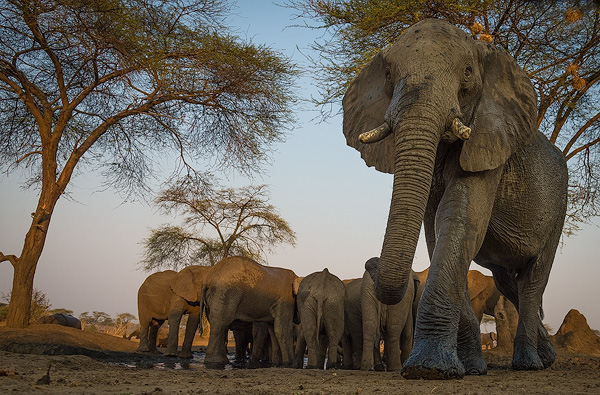
As some of you may know, the trip mentioned in my last blog post was to Botswana.  I’ll say right here, Botswana is a great wildlife photography destination (the very first subject I photographed was a leopard, not a bad way to start!).  Toward the end of the trip I had the opportunity to spend one afternoon in a “bunker blind” at an elephant waterhole.


PACKING

For me, 2013 has been a long-distance travel year.  A “short hop” this year has meant at least five or six hours in the air.  I’m really tired of the longer flights, but right now I’m in the midst of packing for another long flight.

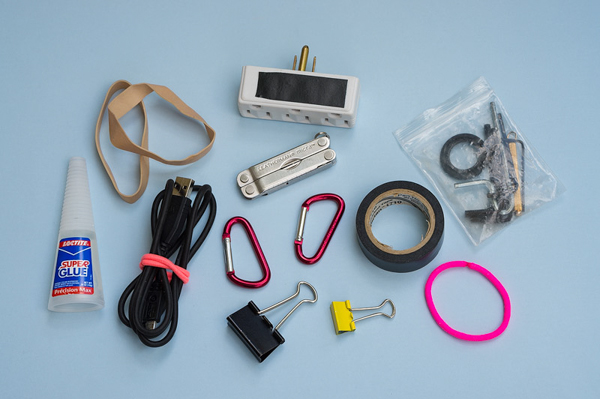
Besides all the usual camera, clothes, and computer stuff, what do I take?  Here’s a list of some odds and ends, in no particular order:

  • A three-outlet electrical jack.  Even notice that most hotel rooms only have two outlets, one of which is generally located somewhere inaccessible under the bed?
  • If I’m traveling internationally, I carry a 120/220 volt power strip with a built–in surge protector and USB ports, http://www.amazon.com/dp/B00B8B9ERK?psc=1.   Added to this are several of the necessary electrical plug adapters.
  • A short roll of electrical tape.  I also have multiple strips of gaffers tape stuck on the inside flaps of my camera pack.
  • A tube of super glue.
  • Brightly colored elastic hair bands (not for my use, since I’m really shy of hair on top, a subject which we don’t need to discuss).  These are a cheap and easy way to wrap cables and cords, and the bright colors help me find those cables when I drop some in a dimly lit room.
  • A small tool kit: a selection of allen wrenches (hex keys), small screwdrivers, plus an extra rubber ring that goes around the eyepiece on my camera (anyone else ever lose one of these?).
  • A couple of large rubber bands, great for getting a grip on stuck filters.
  • A Leatherman “Micra” tool.
  • About 15 feet of lightweight parachute cord.
  • Several binder clips, used to clamp things together.
  • A couple of mini-carabiners.
  • Several trash compactor bags, much stronger that standard plastic garbage bags.

I keep PDF versions of my camera manuals on both my smartphone and my Kindle.  I also have a flash card wallet filled with older cards that are now too small capacity for my day-to-day use.  This lives in my wheeled duffel, along with an extra card reader.  Not that I’m paranoid, but I imagine being at some remote location and losing my flash cards, or having my card reader die.  I would be saying words that most people would not want to hear.


RUN A TEST

I was recently in a photographic situation where high ISO was required.  I was shooting with a group, and I was asked as to the highest usable ISO.  My answer:  it  depends on several factors.

  1. Every camera has different high ISO liabilities.  What does your camera do?
  2. How much noise is acceptable to you?
  3. What are you going to do with your images?  Downsizing a file removes noise, so you can get away with a lot if all you’re going to do with the image is posting it to the Web.  Making large prints, however, is another matter.

I suggested that everyone run one simple test.  Mount the camera on a tripod, and shoot the exact same scene, changing the ISO by one stop between frames.  Since ISO values work in straight numerical doubles, this means simply doubling the ISO number every time: 400, 800, 1600, 3200, etc.  Open the resulting images, and decide for yourself what is acceptable. It doesn’t matter in the least what you actually photograph, as this is only a test.  Subject matter is no big deal.  You just need to know how far you can push the ISO and still get acceptable results.

Easy, right?  The next day we were, as expected, in the same situation where higher ISOs were needed.  I asked the group how many of them had run my suggested test, since we had known exactly what we were going to be photographing on the new day.  The answer: no one, none, nobody.

Folks, you gotta take some responsibility here.  You really need to run some tests, and testing some basic concepts is not difficult to do.  Just shoot some comparison frames.  Test IS/VR on and off, at both fast and slow shutter speeds.  Test for the lowest shutter speed you can handhold and get acceptable results.  Test long exposure noise reduction on and off.  Test TTL fill flash settings.  Don’t believe anything you read on the Web — including what I say — until you’re tested with your equipment, and your reasons for photographing, and your criteria for what is “good.”

An ISO test is so simple.  And once you’re shot those frames, you now have them to use in testing noise reduction methods.  Lightroom noise reduction only?  Noise reduction software (since free trial versions are available)?

Like I said, it doesn’t matter what you photograph.  Here’s a 1:1 crop from a shot I took in my garage.  Great image, huh?  But it would work fine as an ISO test.  And speaking of which, just what ISO was used?  Hint:  the camera was my Nikon D4.


1:1 crop of ISO test photo.

MAKING CHANGES

In a recent discussion with three other photographers, I commented that I’m constantly changing how my cameras function, depending on my subject matter at any one particular moment.  I was rather surprised when the others responded that they never did this.  All three said the only change their ever made was to the ISO in use.

To be honest, I was rather shocked.  Was I really the odd man out here?

So what changes do I make?  (Some of my answers are specific to my Nikons.)

ISO.  I certainly do change the ISO, especially when I need a faster shutter speed.  At times I turn on Auto-ISO, where the camera sets whatever ISO is needed to maintain my selected shutter speed/aperture combination.

MOTOR DRIVE RATE.  I use the fastest frame rate for critter work, single frame advance for everything else.

MIRROR LOCKUP.  “No” for moving subjects, “yes” for everything else.

METERING PATTERN.  Matrix (evaluative) most of the time, Spot for precise areas.

LCD BRIGHTNESS.  In bright sunlight, viewing the LCD is difficult.  I set the brightness as high as possible in that condition (which makes the LCD much easier to view) and lower the brightness when I’m not in bright sunlight.

THE IN-CAMERA TIME AND DATE.  I rename my files when I download, using YYMMDD at the beginning of the file name, which automatically organizes my files chronologically.  I change date and time as I travel, so that all the files match my itinerary.

EXPOSURE DELAY.  I use a remote release whenever possible, but often use the 3-second delay mode for totally static subjects (where I’m not trying to time lulls in the wind or other movement).

EXPOSURE MODE.  While most of the time I use Aperture Priority, I change to Manual exposure when I want to maintain a given exposure value.  For example, consider a dark bison in winter snow.  If the light is not changing, there is one correct exposure value.  But a fairly wide shot would be mostly white snow, while a tight shot would be mostly dark bison.  Any autoexposure mode would change the exposure depending on how much of the frame was light-toned or dark-toned, but manual exposure would be consistent.

CROP MODE ON MY D800E.  Full frame most of the time; 1.2X crop when I know I will be cropping a bit in post-processing (the smaller file size also gives a slightly faster frame rate, while making the buffer clear a tad quicker).

AF MODE.  I use single point AF for landscapes and static subjects (although generally I’ll also manually tweak focus).  For moving subjects, I almost always use 3D focus tracking, which automatically shifts the primary focus point to follow the movement of the subject.  This is my favorite action AF mode, as I can concentrate on composition and don’t have to keep an AF point centered on the subject.  If I switch from 3D AF, it’s to 21 point AF.  In this mode I have to select the primary AF point, which works best when I know exactly which way the subject will be moving across the frame.  I can’t imagine myself using the same AF mode for all my work.

So what do you do?

Professional Photography

Marissa Mayer is the CEO of Yahoo, and Yahoo owns Flickr, the popular photo website.  Referring to changes at Flickr, she commented:  “…there’s really no such thing as professional photographers anymore.”

Really?  Guess I didn’t get the memo telling me I was no more. 

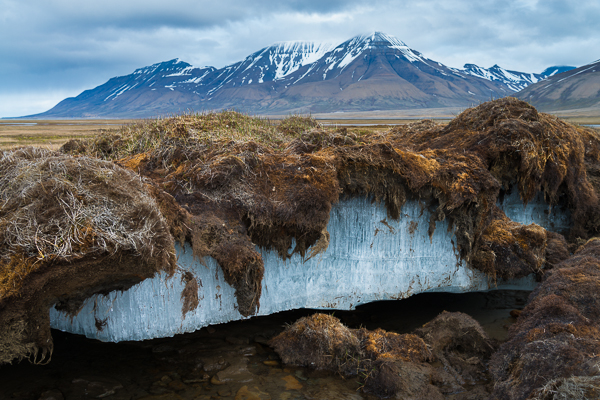
Permafrost.

For Earth Day, 2013.

Permafrost, exposed and melting. Near Longyearbyen, Spitsbergen.

10 Photoshop Tips

1.  To tone down the whites in an image, select them using Color Range.  Add any adjustment layer, and change the layer blending mode to either Multiply or the slightly stronger Linear Burn.  Then drop the layer opacity to taste.

2.  When shooting frames for a panoramic, manually setting camera exposure is more precise than using an autoexposure mode.  Use the middle of the panoramic scene to set the base exposure.  If you’re shooting RAW files, you can leave white balance (WB) set to Auto.  When processing the files in Adobe Camera Raw, or Lightroom’s Develop module, select one image and drag the WB slider from the “as shot” position to a distinct number.  Now sync all the other frames to that WB.

3.  Make a preset to rename your files in Bridge or Lightroom based upon the capture date.  When you travel, reset the clock in your camera to the local time zone.  This way, all your image captures will match up with your itinerary and there will be no confusion as to location.  Just remember to reset the clock when you get home.

4.  Photoshop’s Ctrl/Command+Z undoes the last step you’ve taken.  But using it immediately a second time simply undoes the undo you just made.  To step backward more than once, use Alt/Option+Ctrl/Command+Z.

5.  When preparing an image for printing, as the final step add a 3 pixel black hairline around the perimeter to define the edge.  Three easy ways to do this:

  • Select the entire image, Ctrl/Command+A.  Then do Edit > Stroke, and set pixels to 3, the color to black, and the location to Inside.
  • With the image layer unlocked, add a Layer Style, Layer > Layer Style > Stroke (or click on the fx icon at the bottom of the Layers Palette).  Set pixels to 3, Position to Inside, and color to black.
  • Increase the canvas size, Image > Canvas Size.  Select pixels for the unit of measurement, 3 for the number of pixels, black for the color, check the Relative box, and make sure the middle square is the anchor position

6.  Opening several similar images as layers in Photoshop (from either Bridge or Lightroom) aligns the outer dimensions of the images.  To align the contents, select all the layers, and then do Edit > Auto-Align Layers.

7.  Make a brush to add your name and copyright to images.  Make a new white document no larger than 2500 pixels long dimension.  Add the copyright symbol and your name.  Then do Edit > Define Brush Preset.  For a signature brush, write your name on white paper using a black marker, photograph it (jpeg, small, fine), and size the image to no larger than 2500 pixels.  Using Image > Adjustments > Levels clip the image to pure white and pure black.  Save as a brush, Edit > Define Brush Preset.  If you use either of these brushes on a new layer, you can add Layer Styles (drop shadow, etc.) to that layer.

8.  Caps Lock toggles the cursor display — for example, from standard to precise.

9.  Use the often overlooked Image Processor (from Bridge: Tools > Photoshop > Image Processor) to quickly create new file types.  Select the images, choose an output location, select the file type you want, specify the quality and size, and click Run.

10.  When making selections, remember that the “marching ants” only show pixels that are at least 50% selected.  Outside of the “ants” are pixels that are also selected, just at a lesser amount.


These tips originally appeared as part of an article I wrote for Photoshop World magazine.